How to use a Game Trainer
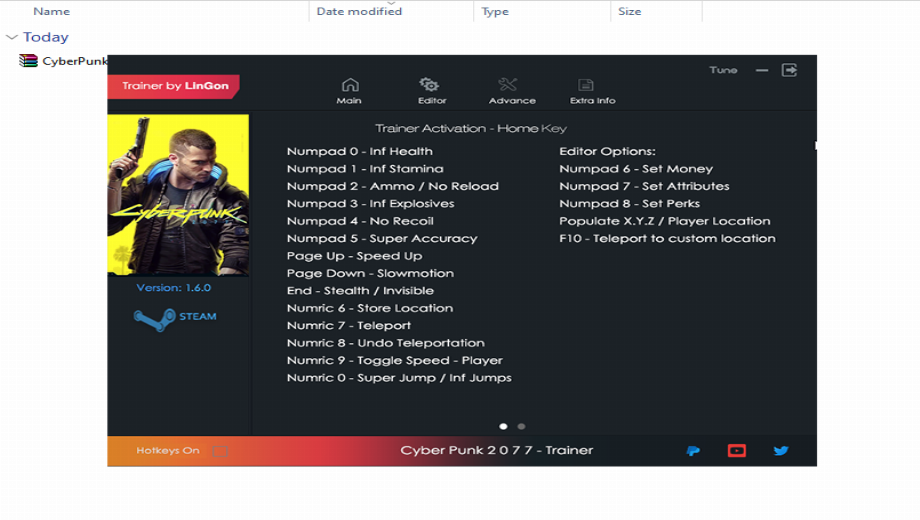
A Game Trainer, briefly, is a piece of software that allows gamers to alter parts of a video game, making them easier, adding difficulty, or even making them more accessible. Getting a Game Trainer is extremely easy; it’s as simple as downloading a file.
Here’s your guide on how to use a Game Trainer, whether you’re downloading a standalone, using all-in-one software, or using Linux or even a Steam Deck.
Stand-alone Game Trainers
Stand-alone Game Trainers are perfect if you only need a trainer for one game. After all, why go to the effort of setting up an account for an all-in-one platform if you’re only going to use it once?
MegaGames has the largest collection of stand-alone game trainers on the Web. Start by downloading the trainer in question.
Most Game Trainers will be a zipped file, so unzip it once it’s downloaded. You may need to rename the file extension from .zipd to .zip. This is done to prevent Web browsers from falsely diagnosing the file as malware. Where you unzip it doesn’t really matter at this stage. Some trainers do need to be in the game’s install folder, but we can cross that bridge when we come to it. For now, just make sure the file is unzipped and somewhere accessible on your computer.
From here the process is simple: The unzipped file should contain a readme or another text file of instructions. While we’d love to be able to give you all-encompassing instructions here, the truth is that the creator of each trainer will have slightly different installation needs, so you need to follow those to the letter.
One common element is that most Game Trainer programs need to be open and running before the game starts. You must also keep it open until the game has closed, or it could cause your game to crash. When you’re in-game, just press the keys specified by the trainer to enable and disable the trainer’s cheats and changes.
All-in-one Game Trainer software
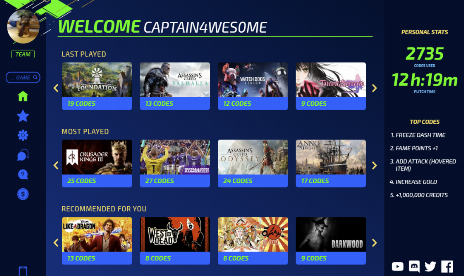
Perhaps the most easy way to set up a game trainer is through an all-in-one Game Trainer program like PLITCH. PLITCH makes using trainers extremely easy, as all you need to do to use them is find it on the PLITCH platform and add it to your library. You can choose which cheat codes are active during your playtime, and you can change the hotkeys used to enable them directly from the platform itself. Think of PLITCH as the Steam of game trainers and you’re not far off.
It’s also a very easy platform to use, making it a great way to dip your toe into game trainers without having to mess around with any settings on your computer.
Start by downloading PLITCH, and installing the .exe file.
Once installed, startup PLITCH as an administrator, and then sign in to your PLITCH account. Make sure you’re able to start it as an administrator, or the cheats may not work. Get started by searching for a game, and then select the version or platform you’re playing the game on through the dropdown box on the right-hand side of the game screen. Take note of the key combinations needed to activate your cheats, and also read any important notes highlighted with an “i” symbol.
You’ll know PLITCH is working if your game launches through PLITCH’s “play” button, and you’ll also hear a sound. To activate the cheat, simply press the indicated keys. Again, you’ll hear a confirmation noise if successful.
Unfortunately, you won’t be able to access all the cheats on PLITCH with a free account, as a number of trainers are locked behind PLITCH’s subscription. You’ll be able to see which codes are locked under the Premium section in any game.
Steam Deck Trainers
“But the Steam Deck is a Steam machine,” I hear you cry. And you’re partly right: The Steam Deck is primarily just for Steam games. But since it runs on a version of Linux it can be used as a PC of sorts too, which means it can work with any game trainers that work on Linux.
As ever with Linux, this procedure is quite complex and intricate, so make sure you’re settled in for the long haul before starting this off. It’s also only really for working with the Steam Deck, so don’t take this as a perfect guide for Linux either.
We’ll be setting up the trainer from MegaGames using this guide. You’ll also find this a lot easier with a Bluetooth keyboard and mouse, so if you have these available, make sure to connect them through your Bluetooth settings.
You’ll need to be in the Steam Deck’s desktop mode for most of this, so start by entering desktop mode. If you’re not sure how to do this, hold down the power button, then select “Switch to Desktop”.
We’ll now need to install Steam Tinker Launcher. Here’s how:
- In desktop mode, open “Applications > Konsole”. Copy and paste the following into the Konsole and press “Enter”.
wget https://raw.githubusercontent.com/frostworx/steamtinkerlaunch/master/steamtinkerlaunch
chmod +x ./steamtinkerlaunch
./steamtinkerlaunch
- This should install the program you need, however if it doesn’t work, you can also check out the official instructions here (https://github.com/sonic2kk/steamtinkerlaunch/wiki/Steam-Deck).
Now you’ll need to download and unzip (if compressed) the game trainer you need. It’ll need to be a stand-alone game trainer, as in the first portion of this guide. Do this on a browser on your Steam Deck’s desktop mode. The next part of the guide involves heading back to your Gaming Mode.
- Head back to Gaming Mode by selecting the shortcut on your desktop.Go to the game page for the game you want the trainer for.
- Choose the “Settings” cog icon, then choose “Properties > Compatibility > Force the use of a specific Steam Play compatibility tool”.
- From the box, choose “Steam Tinker Launcher”. This means the game will open the Steam Tinker Launcher menu before starting the game.
- Hit the “Play” button and choose “Main Menu” from the Steam Tinker Launcher screen before the time runs out.
- Check the boxes for “Use custom command” and “Fork custom command”.
- To the right, select the option to browse for a file. Find the trainer you downloaded earlier and select it.
- Once that’s done, choose “Save and play” and your game will start.
If installed correctly, the trainer should boot first, and you should be able to hear the game starting in the background. To switch between the trainer and game, press the “Steam” key on your Steam Deck, and select the “Switch windows” button beneath “Exit game” in the menu. If this doesn’t show up, turn on “Developer mode” through “Settings > System > Enable Developer Mode”.
The next hurdle is changing buttons to trigger your trainer functions. A keyboard has a plethora of options, but the Steam Deck? It only has a limited number of keys, and most of them will be used. Thankfully, the back buttons exist, and they’re perfect for this.
- Head to the game page you’ve set the trainer up for, and select the “Controller settings” button, then “Quick Settings, Enable Back Grip Buttons”.
- You’ll want to set one to toggle “Num lock”, because the Steam Deck toggles number lock on by default, and this can interfere with trainer commands.
- Set the other to trigger the keys specified in your trainer.
- Now, when in game, press the back button set up for the trainer. If it doesn’t work, try hitting the num lock button first and try again.

- Secure Software (Virus checked, GDPR-compliant)
- Easy to use: get ready in less than 5 min
- More than 5300+ supported Games
- +1000 Patches every month & Support


Unfortunately, the download is no longer available. Here are some alternatives:
- Alternative Trainer: The Hunter: Call of the Wild v2050156-v3139192 (+17 Trainer)



![The Hunter: Call of the Wild v2050156-v3139192 (+17 Trainer) [iNvIcTUs oRCuS]](https://9588947a.delivery.rocketcdn.me/wp-content/uploads/2024/01/thehunter-call-of-the-wild-v1.0-v1.21-scr-01_0-464x276.jpg)

![Resident Evil Village v1.0-v20260203+ (+23 Trainer) [FLiNG]](https://9588947a.delivery.rocketcdn.me/wp-content/uploads/2024/01/resident-evil-village-1-464x276.jpg)


